(continued from Debtors/Creditors Banking)
The Debtors and Creditors Banking programs are accessed from the Accounting application. For this example, Debtors Banking is being used.
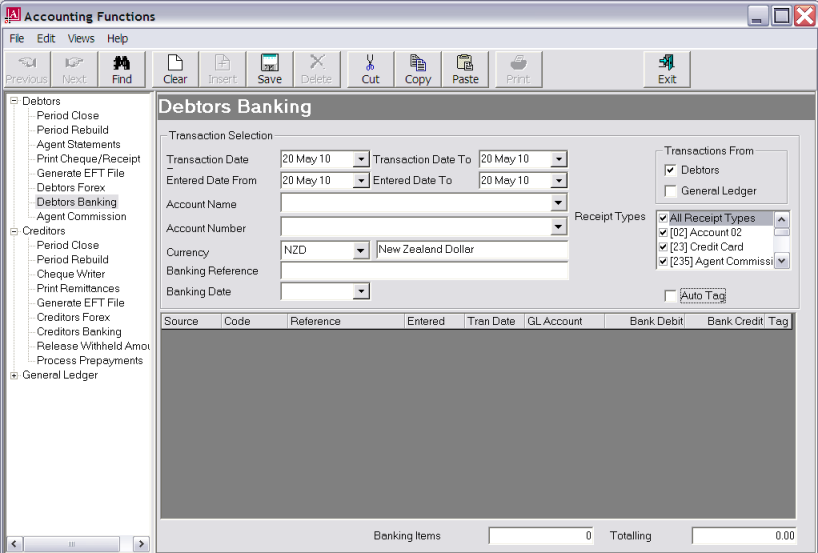
Screen Shot 42: Debtors Banking Screen
Transaction Date From/To (Date)
These default to today’s date. Enter a date range that will encompass the transactions to be included in the banking.
Entered Date From/To (Date)
These also default to today’s date. Ensure that a date range is entered that is wide enough to include the transaction dates entered in the fields above.
Account Name/Account Number (Drop-downs)
Selecting the bank account that the banking is to be applied against from the drop-down will also select the Account Number. Selecting the Account Number will also select the Account Name.
Currency (Drop-down)
Select the currency matching the transactions to be included in the banking.
Transactions From (Checkboxes)
In Debtors banking, Debtors is checked by default; in Creditors banking, Creditors is checked by default. In addition, transactions that have been entered via GL Journals to the Tourplan GL Account(s) attached to the bank account can also be included if necessary by checking the General Ledger checkbox.
Payment Types (Creditors)/Receipt Types (Debtors) (Multi Select List Box)
By default the system includes all payment/receipt types. They can be limited by checking only the types to be included in the banking.
Banking Reference/Banking Date
These two fields must be left blank until the transactions to be included in the banking have been located and tagged.
Auto Tag (Checkbox)
When checked, transactions located will automatically be tagged for inclusion in the banking.
Find
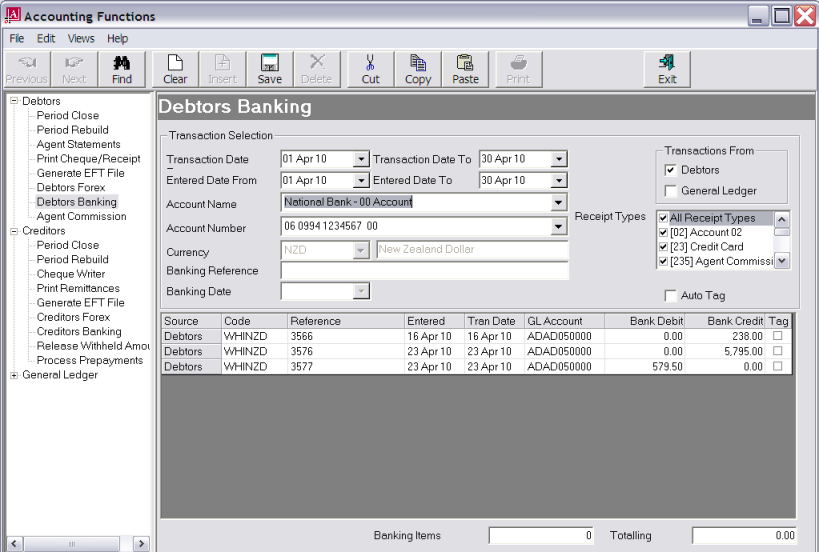
To continue, click the Find button in the button bar.
Screen Shot 43: Banking Transaction Scroll
|
|
The column headings at the top of this scroll are the only headings available for this screen. |
Source
Either Debtors (Creditors) or GL module.
Code
The Debtor (Creditor) code or GL code.
Reference
The transaction reference.
Entered
The date the transaction was entered into Tourplan.
Tran Date
The transaction date entered into the transaction header.
GL Account
The GL bank account code for each transaction. This will be one of the GL accounts attached in the Bank Account Setup (Screen Shot 39: Add GL Account to Bank Account).
Bank Debit/Bank Credit
Depending on the transaction type, and ledger, these fields will display either 0.00 or the transaction amount.
Tag (Checkbox)
If Auto Tag has been selected, the transactions will already be tagged. If they need to be untagged or tagged, click the checkbox.
|
|
The bank debit transaction (Ref 3577) is an agent commission payment created during the A/R—Agent Commission process. |
Screen Shot 44: Example Banking Transactions
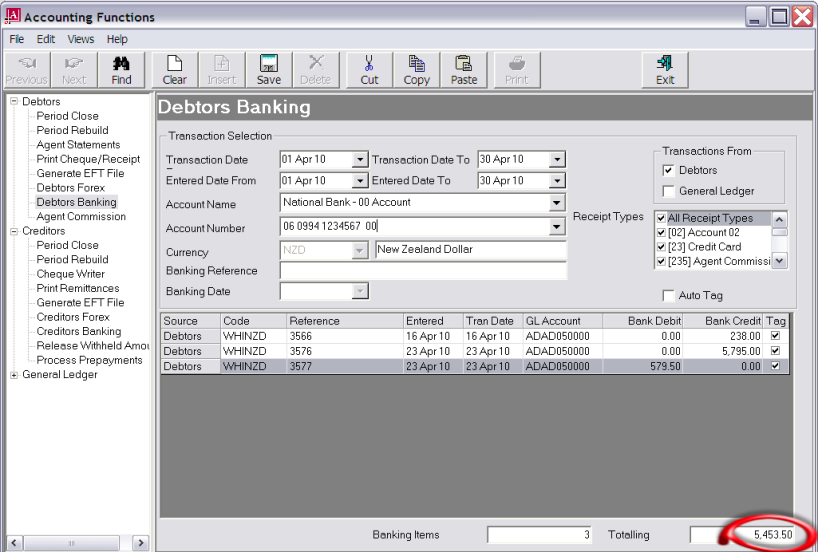
The total amount of 5,453.50 is what will display (and be reconciled) in the Bank Reconciliation program. The individual transactions making up that amount will not be visible in the bank reconciliation.
Save
To continue, click the Save button in the button bar.
Screen Shot 45: Banking Transaction Update Dialogue
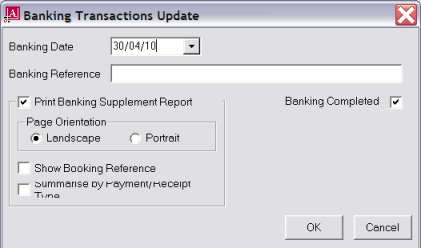
Banking Date (Date)
Enter the date on which the transactions were banked. This date will display in the Bank Reconciliation program.
Banking Reference (20 Chars)
Enter a reference for the banking. This reference will display in the Bank Reconciliation program.
Banking Completed (Checkbox)
If unchecked this banking will be left open for the inclusion of additional transactions.
Print Banking Supplement Report (Checkbox)
Check this box to view and/or print a report of this banking.
Orientation (Radio Button)
Select either Landscape (default) or Portrait print mode.
|
|
The report will initially be displayed on screen and can then be printed. |
OK
To continue, click the OK button in the dialogue.
When the save is completed, the Banking screen re-displays.
(continued in Reconciliations)
 Tourplan iS V2.07 Accounts 2 Training Guide
